
How to choose gypsum board?
Struggling to pick the right gypsum board? A poor choice means future problems and costs. I'll guide you to make the perfect selection for a durable, safe finish.
To choose gypsum board, first identify its use (ceiling, wall, wet area). Then, select the type—regular, moisture-resistant, or fire-resistant. Finally, inspect the board's quality for surface smoothness, edge integrity, and core hardness. Always prioritize certified products from reliable suppliers.
That's the basic process, but the details are what separate a good job from a great one. Understanding these details helps you avoid common and costly mistakes. Let's break down each choice you need to make, starting with one of the most common applications: the ceiling.
How to choose gypsum board for a ceiling?
Worried about your ceiling sagging? Using the wrong board can lead to unsightly dips and costly repairs. Let me show you how to choose boards that guarantee a sturdy, flat ceiling.
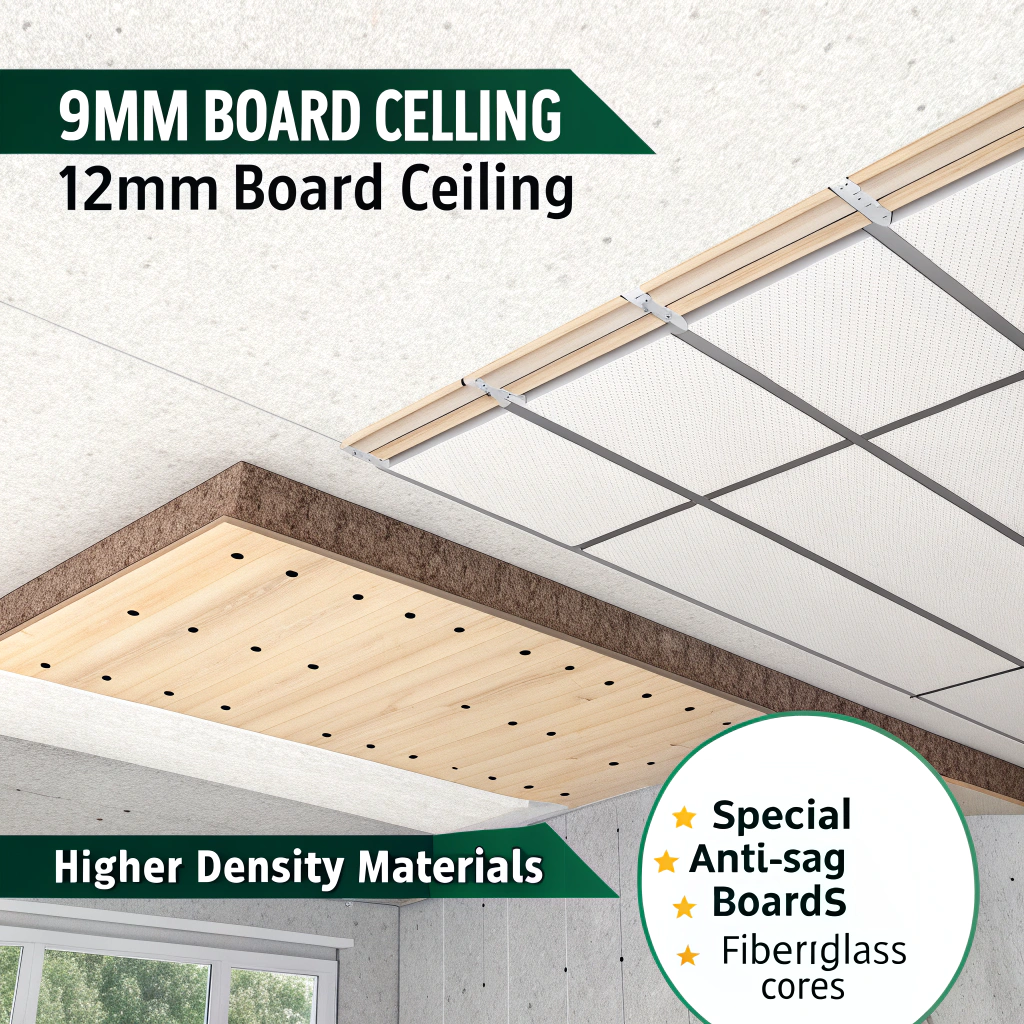
For ceilings, choose a gypsum board with a high-density core and sufficient thickness, typically 12mm (or 1/2 inch). This provides better sag resistance. Anti-sag or ceiling-specific gypsum boards are ideal, especially for wider joist spacing. Always check the manufacturer's specifications for ceiling applications.
Ceilings are a constant battle against gravity. A board that is too thin or has a low-density core will start to sag over time, especially in humid conditions. I remember a project in Southeast Asia where a contractor tried to save a little money by using 9mm boards on the ceilings. Within a year, we were called back to fix visible sagging across multiple rooms. It was a costly lesson for the client. The standard for ceiling applications should be 12mm (1/2 inch) board. For spaces with wider joist or truss spacing, I strongly recommend using special anti-sag boards. These often have fiberglass mixed into the gypsum core, which adds significant structural rigidity without adding much weight. It’s a small extra investment that prevents a huge future headache.
Here is a simple guide for joist spacing and board thickness:
| Joist Spacing | Recommended Board Thickness |
|---|---|
| 16 inches (40cm) on center | 12mm (1/2 inch) |
| 24 inches (60cm) on center | 12mm Anti-Sag or 15mm (5/8 inch) |
What are the different types of gypsum board?
Think all gypsum board is the same? Using the wrong type can cause serious issues like mold growth or fire hazards. I'll help you understand the key differences to protect your project.
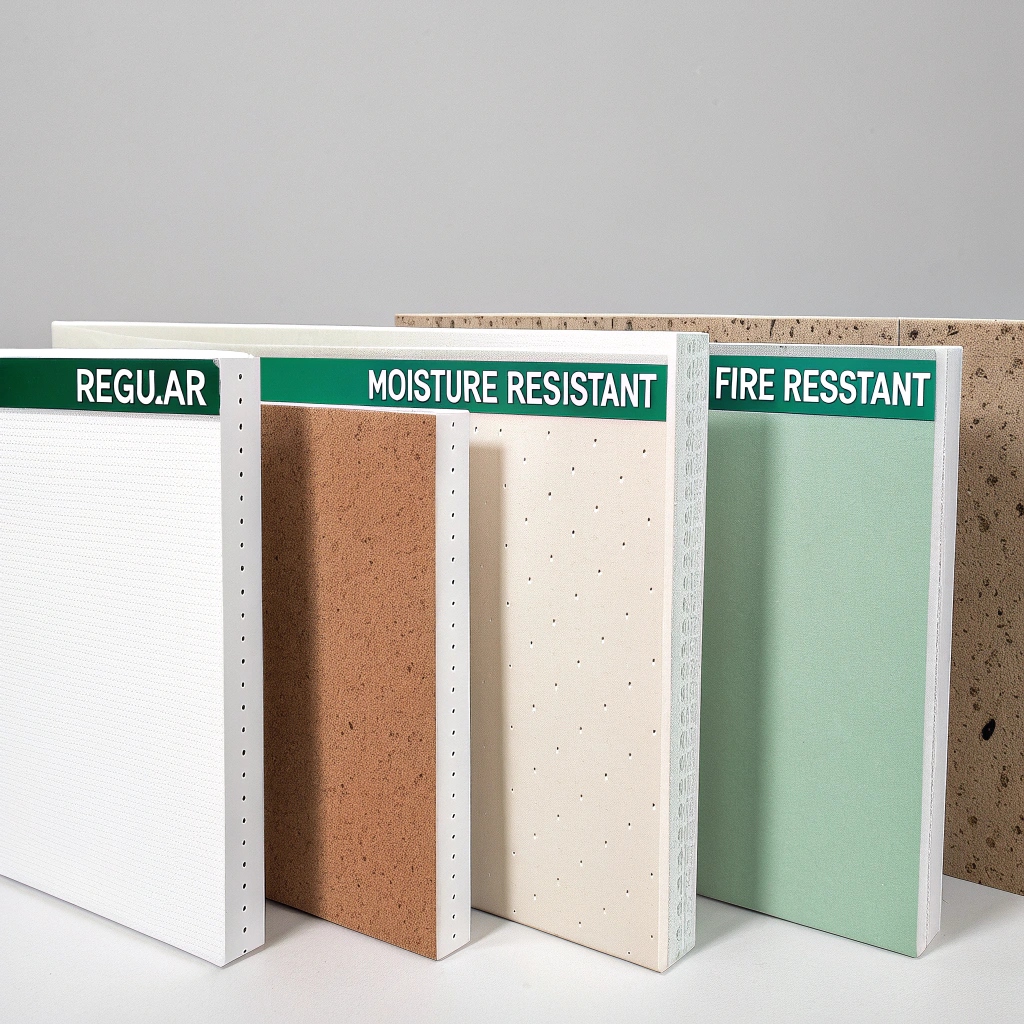
The main types are Regular (for walls and ceilings in dry areas), Moisture-Resistant (green board for bathrooms/kitchens), and Fire-Resistant (Type X for enhanced fire safety). Each has a specific core and paper facing designed for its intended application and performance.

Matching the board to the environment is critical for the durability and safety of any space you design or build. Using a standard board in a bathroom is a recipe for disaster. The constant humidity will cause the paper to peel and the core to deteriorate. I’ve seen this happen many times. That’s why we have specialized boards. You wouldn't use the same tool for every job, and the same logic applies here. Each type is engineered for a purpose. Understanding these purposes allows you to build spaces that are not only beautiful but also safe and long-lasting. As a building materials professional, knowing your materials is the foundation of quality work.
Here’s a breakdown of the most common types:
| Type | Key Feature | Typical Use | Paper Color |
|---|---|---|---|
| Regular Board | General purpose, lowest cost | Walls and ceilings in dry areas | White/Gray |
| Moisture-Resistant | Water-resistant paper & core | Bathrooms, kitchens, laundry rooms | Green |
| Fire-Resistant (Type X) | Glass-fiber reinforced core | Garages, multi-family housing | Varies, often Gray |
| Soundproof Board | High-density or layered core | Home theaters, offices, apartments | Varies, often Blue/Purple |
What are the methods to identify the quality of gypsum board?
Can't tell a good gypsum board from a bad one? A poor-quality board can crack easily and ruin your finish. I'll show you simple, on-the-spot tests to check for quality.
To identify quality, check the surface: it should be smooth and flat without blemishes. Inspect the edges for clean cuts and no crumbling. Tap the board; a solid sound indicates a dense core. Also, check the brand and certifications to ensure it meets industry standards.

In my years of sourcing building materials from China for global customers, I've learned that not all products are created equal. This is especially true for gypsum board. Small, low-cost factories often cut corners. They might use impure gypsum or lower-density formulas, resulting in a brittle product. A good quality board should feel solid and substantial.
Here are the practical checks I use on-site:
- Surface and Paper: Look at the board's surface under good light. It must be perfectly flat and smooth, with no bumps or ripples. The paper facing should be bonded tightly to the gypsum core, especially at the edges.
- Edges: The factory-cut edges must be sharp and straight. If the edges are crumbling or soft, it’s a red flag for a weak core. A board with weak edges will be difficult to finish properly.
- The Tap Test: Tap the center of the board with your knuckle. A quality, high-density board will produce a dull, solid thud. A low-quality board will sound hollow, which indicates a less dense and weaker core.
- Check the Brand: Always choose products from reputable manufacturers who can provide quality certifications like ASTM or EN standards.
How to choose cost-effective gypsum board?
Trying to save money on your project? Choosing the cheapest gypsum board can backfire with expensive problems later. Let’s talk about how to find true value and long-term savings.
To choose cost-effectively, match the board type to the specific need—don't over-specialize. Buy from reputable suppliers to avoid waste from damaged boards. Consider the total installed cost, not just the price per sheet, as better boards are easier and faster to install.

True cost-effectiveness is about the total project cost and long-term performance, not just the initial price tag. I always tell my clients that the cheapest board is often the most expensive one in the end. Why? Because of waste, labor, and repairs. Low-quality boards are more likely to break during handling and installation, so you have to buy more to account for the waste. Bad boards are also harder to cut and finish, which increases labor time and drives up your costs. A high-quality board cuts cleanly, finishes smoothly, and reduces installation time. This saves you money on labor, which is often a bigger expense than the materials themselves. Prioritizing quality means fewer callbacks and repairs down the line, protecting both your budget and your reputation.
Here is a simple comparison of total cost thinking:
| Factor | Cheap Board | Quality Board |
|---|---|---|
| Initial Cost | Low | Higher |
| Waste (Breakage) | High (5-10%) | Low (1-2%) |
| Installation Time | Longer (difficult to cut/finish) | Faster (clean cuts) |
| Future Repair Costs | High (sagging, cracks) | Very Low |
| Total Lifetime Cost | High | Low |
Conclusion
Choosing the right gypsum board is about matching the type to the use and prioritizing quality over price. This ensures a durable, safe, and truly cost-effective result.
More to read

Kim
Hello everyone! I am Kim. I love my job and feel happy at work. My family has been engaged in the building materials industry for more than 30 years, starting as a skilled worker and then running our own one-stop supply chain and export trading company for building materials. Here, I want to share my experience - let's grow together!